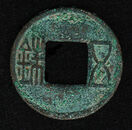
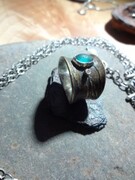
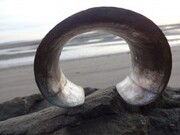
This winter I have been on a quest for patina. Patina is a tarnish that forms on metals such as copper, bronze or other like alloys after exposure to oxygen, rain, salt and other natural elements over a long period of time. It causes iron to rust and sometimes produces shades of green coloring in copper.
My goal was to coax color development in metal that is evocative of timeworn surfaces. To produce a texture and finish that works in harmony with the design of my jewelry. Easier said than done…
Several years ago, I bought a book about Japanese patina methods. I made some attempts to patina shibuichi-an alloy of copper and silver that was once used for Samurai sword decoration. The results were pretty uninteresting. Maybe I didn’t have enough patience or time to invest in experimentation. (ya think?) Perhaps I was expecting to get results in a hurry (no comment.) In any case, I packed up the supplies and equipment and put it away for another time…
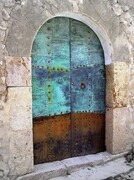
Inspirational (and metaphorical) examples of patina, doors and keyholes…..
Japanese patina trials part two:
This winter I brought out the box of supplies, re read the book Japanese Patinas by Eitoku Sugimori and decided to give it another go. This time with full surrender to the experimental process and all the mystery that accompanies it. This time with patience.
Before you can try out any of the recipes you must have a copper pot. Any other metal with interact with the chemicals used for patina. A glass pot would be an okay substitute, but the copper imparts something extra to the coloring process.
Finding an all copper pot isn’t as easy as one might think. After scouring the internet (they were either very expensive or lined in tin,) I mentioned the search to my sister. She was getting ready to take a load of stuff to the Goodwill-including our grandmother’s fondue set, which was all copper. Perfect timing!
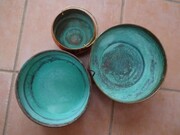
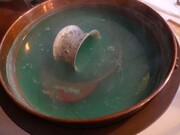
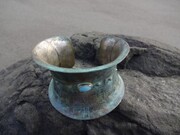
Once word got out that I was on the lookout for a copper pot, two other friends donated to the cause. Now I have three pots in handy sizes. The photo shows them after patina usage, with chemical residue building up inside. This residue strengthens the next batch of patina-it it sort of like seasoning a pan. FYI: the name patina is derived from the Latin for “shallow dish.”
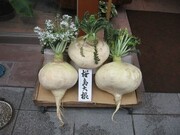
After ordering copper sulfate and rokuso (a Japanese chemical used in some of the recipes) I had to get some daikon radish. This is part of the traditional process. It is grated and applied to the clean metal just prior to immersion in the patina bath.
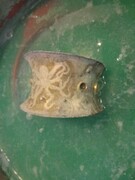
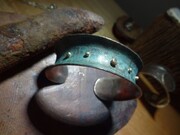
Of course, before this can happen, the jewelry piece must be in a near finished state. All forming and soldering completed. There is no going back after the patina bath-except to start the process all over again. If using stones, the setting of these takes place after the patina, being very careful not to mar the surface. The cuff in the patina bath below has been etched (see my January2014 post to learn about that process) formed, had rivets applied and bezels for stones soldered in place.
This cuff is made from shibuichi consisting of mostly copper alloyed with silver.It can be purchased with amounts of silver content ranging from 25%, 15% or 5%. I decided to try all three and take careful notes on the differences. I am not going to transcribe my notes here-but rather show with photos the alchemical journey…I was trying out a layered patina.This is a multi step process. First, a foundation layer of patina is applied by immersing the object into near boiling Niage solution. This can create colors ranging from straw to silver grey to browns. It depends on the metal content and a lot of variables. I had no idea how much time it might take, it doesn’t specify in the book. When I decided the color was not changing any more, I removed it from the pan and rinsed.
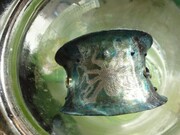
The second part of the process involves fuming the piece. A mixture of ammonia, salt and vinegar can be used, brushing it on the piece and enclosing in a glass jar
This produces a blue green color in crevices and craggy spots.
Athena-Goddess of Patina
The above piece changed a lot during this part of the experiment. I went from loving it to hating it. From bliss to despair. Deciding there was nothing to lose, I rinsed it, burned off the surface color and started over. It is still in a fuming jar as I write this. At about this time I realized that there must be a god of patina. And I needed to make a request before trying again. To ask for a little guidance and oversight (or insight!) My searches brought me back to Athena-Goddess of arts, craft, wisdom, war and metal. The rest is between me and her…
Some of the first pieces:
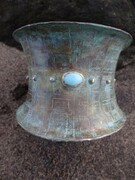
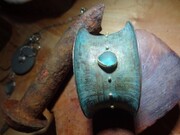
This cuff is shibuichi with etched Japanese textile pattern, silver rivets and amazonite set in 18kt gold. It is 3 inches wide. It has a coat of wax rubbed into the surface to protect the patina and finish.
These two are also shibuichi, variations on a theme..the one on the left has 22kt gold rivets and a diamond in the center. It is one inch wide. The one on the right has 22kt gold rivets, and a piece of Victorian era sea glass set in 22kt gold. It is two inches wide.
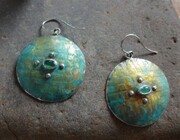
The earrings are shi as well, but a higher silver content, They were more challenging to patina, but I like the way they came out, like little shields. The ring is etched bronze with sea glass and a diamond. In the same patina bath,the bronze turned a milk chocolate brown-pretty with the blue green sea glass.
I feel that the above group was successful in that they are consistent color-wise-and now I have something to build on. Stay tuned for more as I continue to experiment and develop a color vocabulary…
I will conclude this by saying that every part of the jewelry making process is pretty much about control and technique. Until we get to patina. This is unpredictable territory filed with variables. It is a mysterious and intuitive process. It is a collaboration of science and art. It is magic, pure and simple.
